
What are the parts or layers of a roof on a house? That’s one of the best questions a homeowner can ask to make sure they understand what they are getting in their new roofing system. In this article, we walk you through step by step of each parts of a house roof and what that item does to support your roofing system.
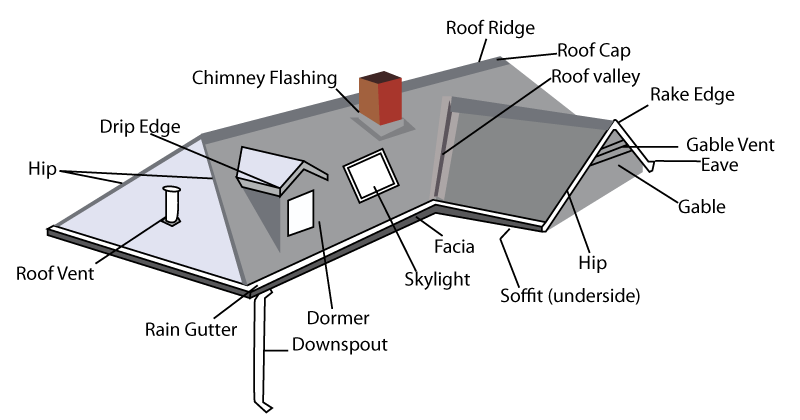
What are the Parts of a House Roof?
- Roof Decking
- Ice & Water Shield
- Underlayment
- Starter Shingle
- Shingles
- Ventilation
- Flashing
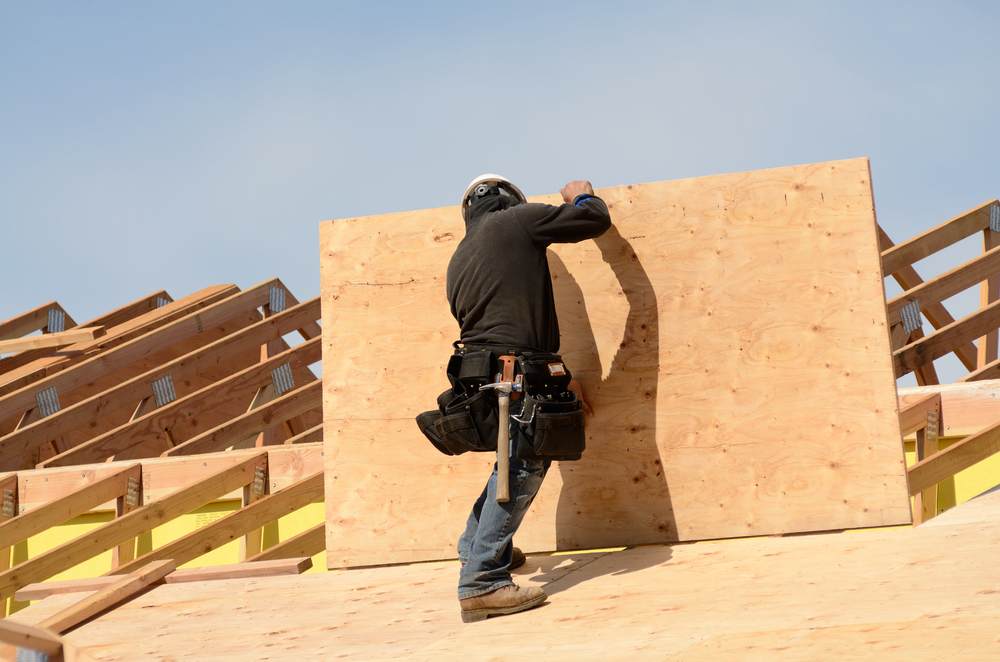
Roof Deck
Roof decking, also called sheathing, is the base of your roof. Decking is one of the most important parts of a house roof. It supports all of the materials on top of it. If your home’s decking is rotting and unable to support the weight of the roof you risk having leaks or worse a full cave-in.
The most popular material for decking is OSB (Oriented Strand Board). OSB is composed of wood strands that are bonded together with a resin. This is usually the material of choice because of its strength and price point. Although you may also find in some situations that the builder/ roofer will use plywood which is a far denser/ strong material but also more expensive.
Rotted decking is usually caused by water getting past the shingles and underlayment. Even if your roofing system is solid your decking can still become rotted if there is overflow from your gutters or excessive humidity in your attic due to lack of ventilation. If you should ever see rotted decking you should have the issue fixed immediately. Leaving the rotted decking can cause mold, damage to your home, water damage on your ceiling or walls, and even fire if the water coming through causes a shortage in your electrical system.
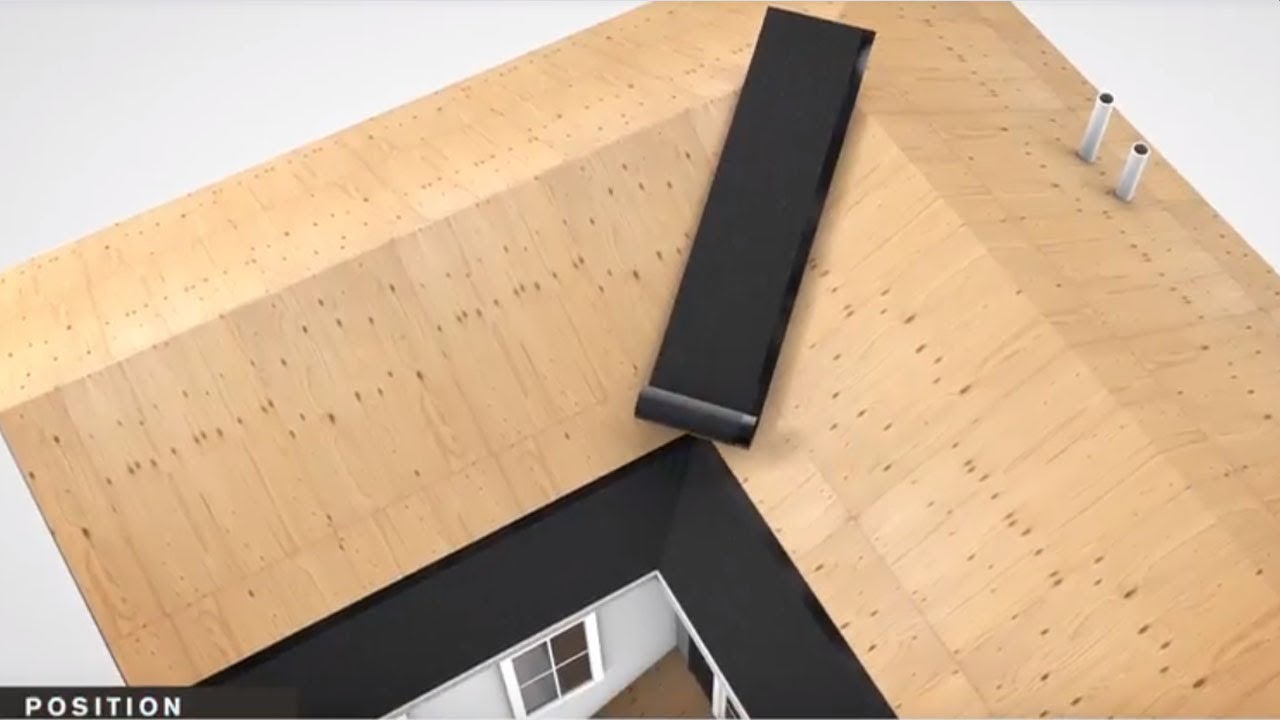
Ice & Water Shield
Ice and water shield is a roof underlayment that protects vulnerable areas of a roof from ice and water damage. This underlayment has an adhesive layer on the back of it that attaches itself to the woof decking.
The two risks your roof is exposed to without using ice and water shield are ice dams and wind-driven rain.
Ice dams form from the continuous melting and freezing of snow. When the snow melts the water runs down until it reached the soffit at which point it refreezes and constantly builds up.
Wind-driven rain is linked to ice dam formation. This happens with a strong storm blows up on your shingles and ends up getting moisture underneath your shingles. Though ice and water shield will help this situation it’s not a full-proof method considering the variables and severity of the storm.
Most commonly, roofers install ice and water protector on eaves, rake edges, overhangs and valleys, as they are most vulnerable to ice dams and wind-driven rain. As well, this may be a building code requirement in some cities. roofers should also be installing around anything that penetrates your decking such as skylights or ventilation. You also usually see ice and water shield installed on low slope roofs and in some cases where the weather is severe, you will see roofers install it on the whole roof regardless of pitch.
Underlayment
Put simply underlayment is either a synthetic fiber or felt that creates a waterproof layer. In most cases, your entire roof will be covered in this material to make sure to weatherproof it from rain, wind, and snow. Underlayment provides your roof with an extra layer of protection that shingles alone can’t match. Shingles make sure you are protected from the sun’s rays and hail during hail season, but underlayment makes sure to cover what shingles cant do which providing a waterproof layer.
Underlayment should be used at the eaves, valleys, protrusions (chimneys, vent pipes, skylights, etc), and low slope roofs.
There are three main material types for underlayment. First, being asphalt-saturated felt which is the usual go-to roofing underlayment 15 years ago. This type of underlayment is referred to as “felt paper” or “tar paper”. It’s a heavier product but usually cheaper than a synthetic underlayment.
The second type of underlayment is synthetic underlayment. This type of underlayment is much more tear-resistant and does not absorb water. It maintains its integrity even when exposed to water and the cold. The downside to it is that it is usually more pricey.
Lastly rubberized asphalt, contains a higher percentage of asphalt and rubber polymers to make it waterproof. Because of this, it is by default more expensive. This type of underlayment comes with a sticky adhesive on the back to be able to be pulled off and stuck directly to the decking making it waterproof.

Starter Shingles
Starter shingles are appropriately named considering it is where you start shingling the roof. They are usually a gray/black color considering the fact they won’t be seen. The first row of shingles sits on top of the starter shingle sealing at the bottom. They are made with the same materials as asphalt shingles. Usually made out of fiberglass and asphalt.
The starter strip is usually installed at the lower eave edge of the roof. Although you will see many roofers install on the rake as well to protect from wind. When the starter is installed on the rakes it allows the installers to have a straight line giving them the ability to give you the most pleasing eye installation. Usually, the starter shingle will overhang the roof by 1/4 inch to 3/4 of an inch.

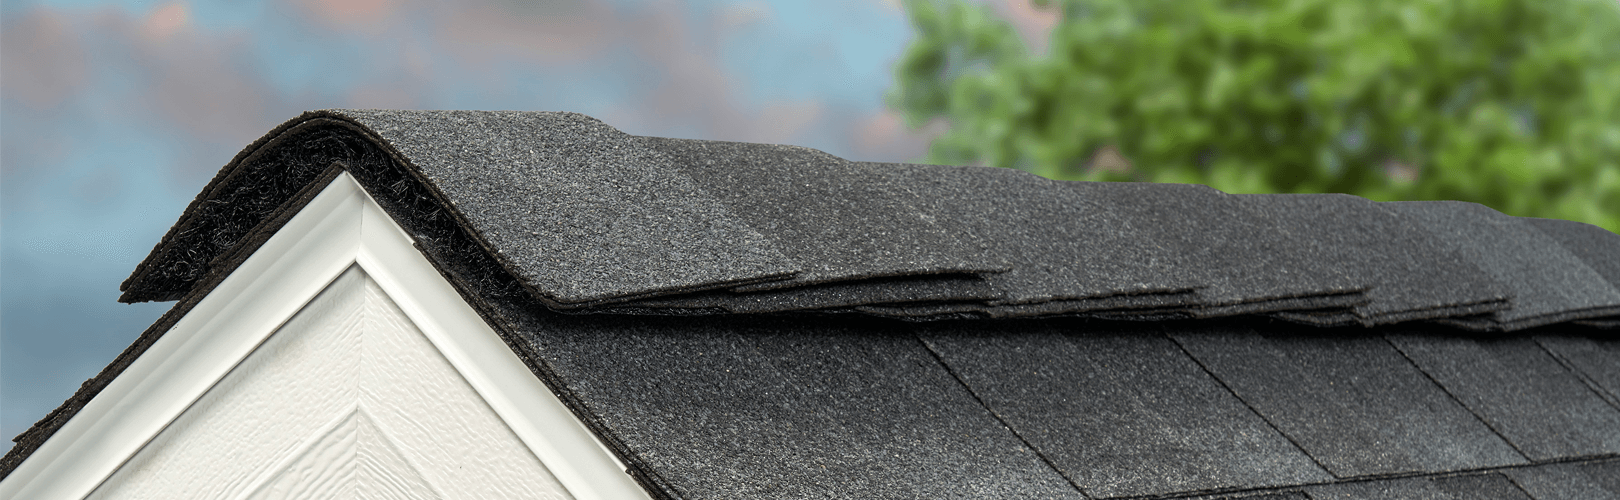
Shingles
The main parts of a house roof for you are of course shingles. Shingles come in a variety of colors, types, and shapes. The most common type of shingle is the asphalt shingle. This comes in three different types which are 3-tab, architectural, and luxury shingles. Each type comes with different installation requirements, wind ratings, hail resistance ratings, and warranty.
3-Tab shingles are your base model of shingles. They are created using fiberglass, asphalt, and granules. They are only one layer thick and lay flat on your roof. Most of the time they will be rated for 20 years max against the elements. These shingles are also going to be the best for budget projects. Though these do protect you from the elements they are the easiest to get damaged and age the poorest.

3-Tab Shingles
Architectural Shingles are a step above the 3-tab shingle. They are usually created with the same materials as the 3-tab (asphalt, fiberglass, and granules). Though they are created with the same type of materials you are getting twice the layers. With these layers, you get more of a three-dimensional feel to the roof giving your more of an astatically pleasing view. These shingles also bring a longer lifetime guarantee to them usually being good for 30 years.
:max_bytes(150000):strip_icc()/Fotolia_23945426_S-56a4a2c23df78cf772835cd4.jpg)
Architectural Shingles
Luxury Singles are designed to replicate the more expensive options such as slate and cedar shake but with asphalt. With these more design-focused shingles comes a bigger price tag though. Some of these shingles can cost upwards of 10 times the amount of an architectural shingle. Most of these shingles will sport more layers than the previous two shingles making them more impact and tear-resistant. These shingles can usually have a guarantee of 50 years depending on the manufacturer.

Luxury Shingles
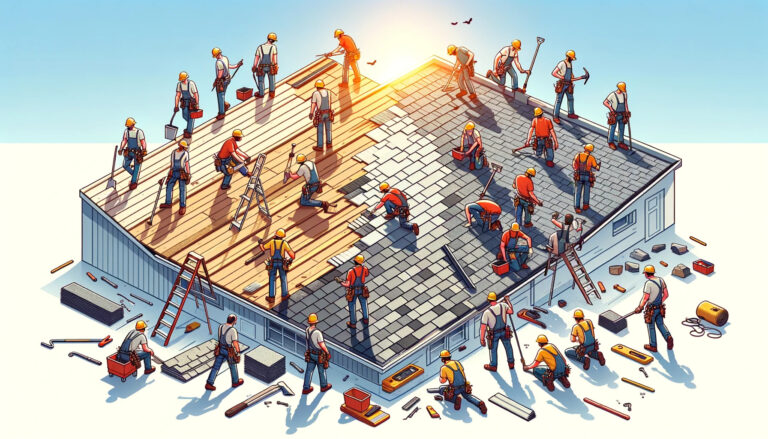
All of these shingles are pretty much installed the same. Starting from the bottom of the facet you nail down in the middle of the shingle on the nail strip with the manufacturer’s specked quantity of nails. Going row by row you climb up the roof laying them and stacking the higher levels on top of the nail strip that you nailed before. With the layering system, you are able to shield your decking and underlayment from most weather situations.
Ventilation
There are very many different types of ventilation that you can install on your roof. Ventilation is necessary to make sure to keep your house cool and not to build up moisture which will eventually settle and possibly develop mold or mildew. Ventilation is probably the most overlooked part of a house roof.
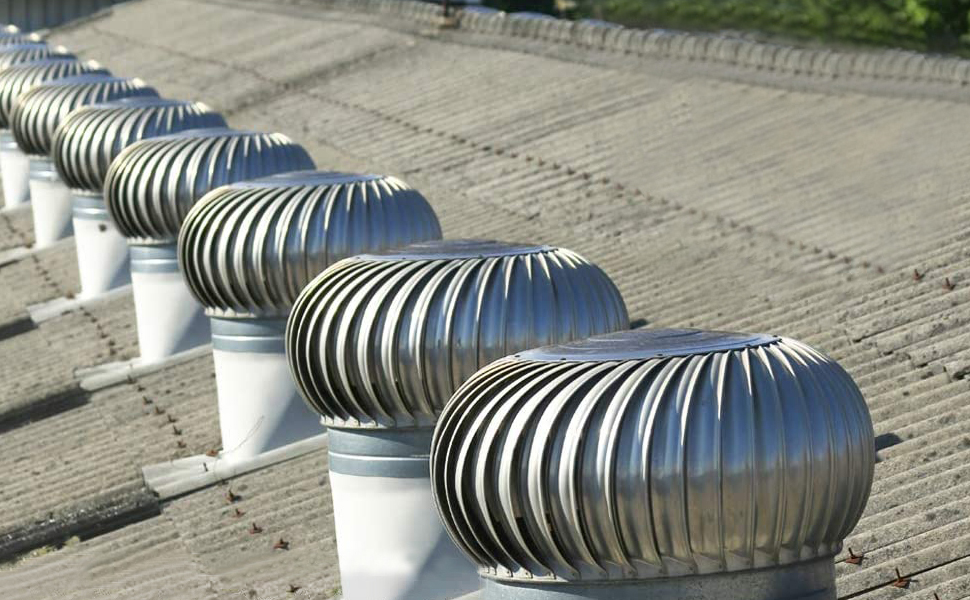
The different kinds of ventilation that you will usually see on a roof are ridge vents, turbines, box vents, and power vents.
A ridge vent is the best-looking ventilation solution. It is installed at the peak of the roof where two facets intersect. That vent is then covered with shingles to protect it from rain getting in.
Turbines a built to the wind that is blowing by and pull the hot air out of your attic. These vents have been used for decades but can sometimes become noisy and an eyesore.
Box vents are just simple vents that are passive meaning they don’t have moving parts. Box vents just allow hot air to escape the attic as fast as it rises. With that being said since it’s not doing as much as the turbines you will have to install more of them to properly cool your attic space.

Lastly, power vents are run either through a solar panel that is on top of it or is directly wired into the house. These power vents have the advantage of running 24/7 and not being reliant on the wind to suck the hot air out of your attic. They are a bit pricier than the previous solutions but a solid solution at that.

Flashing
Continuous flashing: Also known as “apron flashing”. Installing one long piece of continuous flashing provides protection to the joint between a wall and a sloped roof.
Drip edges: Installed under the roofing felt along the eaves of a roof. This helps water get diverted off the roof without hurting your house.
Step flashing: Step flashing is a rectangular piece of flashing bent 90 degrees. You overlap these pieces to make the location waterproof.
Valley flashing: W-shaped piece of metal flashing. This is usually in the areas where two valleys of a roof plane join.
Vent pipe flashing: A cone-shaped fitting flashing that is installed around the pipes on your roof in the shingles.
Base flashing: The base flashing is continuous flashing (or apron flashing). This is pretty much like continuous flashing. Usually used at the bottom of the flashing.
Counter-flashing: Placed opposite to base flashing, or above base flashing, counter-flashing completes the two-part team.
Cap flashing: An L-shaped structure that lies flat against the roof and other fittings such as windows. The shape of the structure runs water off in the opposite direction. This prevents it from pooling in any cracks around the fitting.
Chimney flashing: Flashings need to be applied around the chimneys. This prevents water from pooling in the gaps between the roof and the chimney bricks. To begin, apply chimney flashing in two pieces (base and cap). Next, place base flashing across the bottom of the chimney while using step flashing to cover the sides. Finally, caulk the cap flashing where it laps over the other flashings to prevent water from running behind them.
Saddle flashing: Used to cover protruding beams or railing.
Skylights: Often skylights have a built-in flashing to protect water from seeping in, but sometimes roofing professionals must create it or purchase it separately. First, fit continuous flashing along the base of the window, then step flashing up the sides, and last saddle flashing would be installed at the top of the window.
Kick-out flashing: Used to bridge the gap between where step flashing ends and the gutter begins. Kick-out flashing directs water away from the wall and into the gutter.
Conclusion
There are many parts of a house roof. We know that there are more parts that we didn’t even cover in this article, but this gives you the biggest understanding of what goes into your roof without getting into the smaller pieces.
If you think you might have damage please reach out to us so that we can help you get your home back to the safe haven it’s suppose to be.
We serve residents in Sherman, McKinney, Dallas, Fort Worth, and more.
Call us at (888)-ROOF-NOW or contact us online through our form or live chat!

One Response
I couldn’t refrain fгom commenting. Еxceptionally well wгitten!